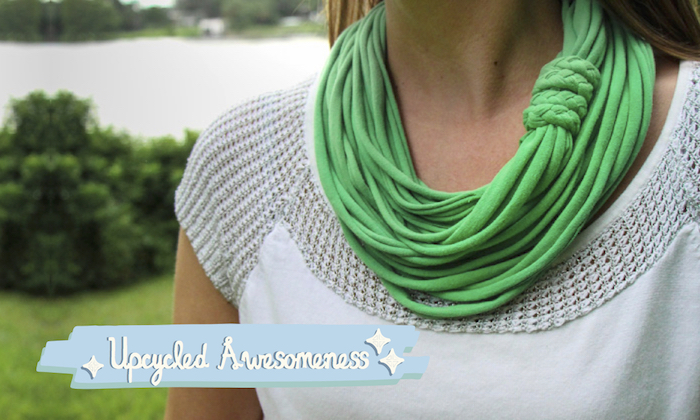

Looking to get crafty this weekend with the bubs, mama? Here’s an easy (and FREE) upcycling project for the weekend!
As the world becomes increasingly close to major climate change and everyone joins the battle of being eco-friendly, we here at Sassy Mama are also big advocates of all things sustainable. Just check out one of our contributors’ post on creating a capsule wardrobe, or this lineup of Earth Hour activities, and even how modern slavery can be combatted with sustainable practices that anyone can partake in.
This time, we’re showing you how to upcycle with ease with the help of the folks at One Raffles Place! I recently attended a fabulous DIY workshop in support of the mall’s Find Your Eco-Style campaign, and decided to share this fun craft project that you and the bubs can try at home. If you and the kiddos have some old T-shirts you can’t bear to throw away or donate, you can still repurpose them into accessories you’ll love. All you need is a cotton jersey T-shirt or two in an exciting colour (the bigger the better!) and a pair of craft or fabric scissors. It can be done in just 7 steps or less, and takes just half an hour to complete!
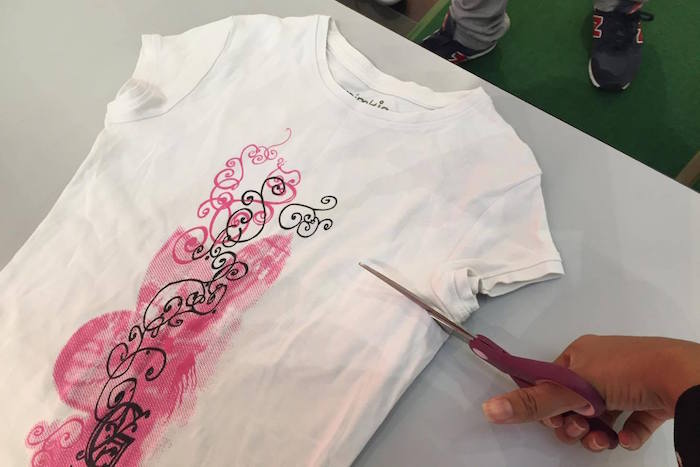

1. Cut T-shirt across from pit to pit
Lay your T-shirt out flat and start cutting across from one armpit to the other. You can then remove the part that has the collar and sleeves, and put it away since you won’t be needing it anymore. T-shirts make for great dusting rags, though!
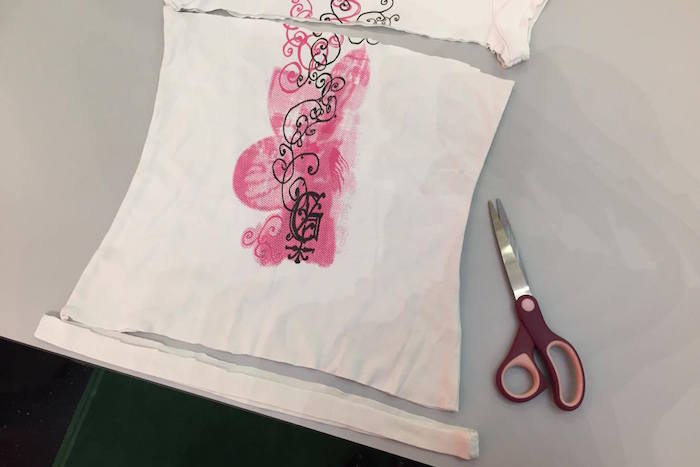

2. Cut the bottom hem off and set aside
Snip off the hem and keep it for later. You can use it to tie the ends of your necklace or scarf once it’s complete.
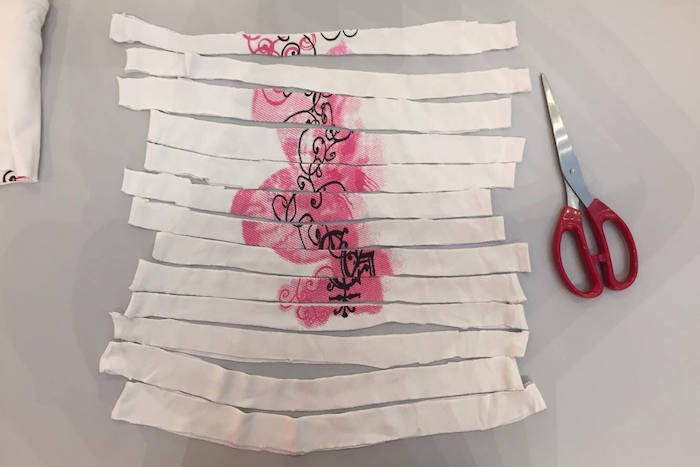

3. Cut 1 inch-wide strips horizontally
For a cool and wearable everyday necklace, just cut 1 inch-wide strips horizontally across the fabric. You’ll see later that they’ll turn into skinny noodle-like strips that are great as a neck accessory. If you’d like to make a comfy scarf instead, you should use a larger T-shirt and cut wider strips. Do not cut vertically as this will remove the loops that you need to create your necklace or scarf.
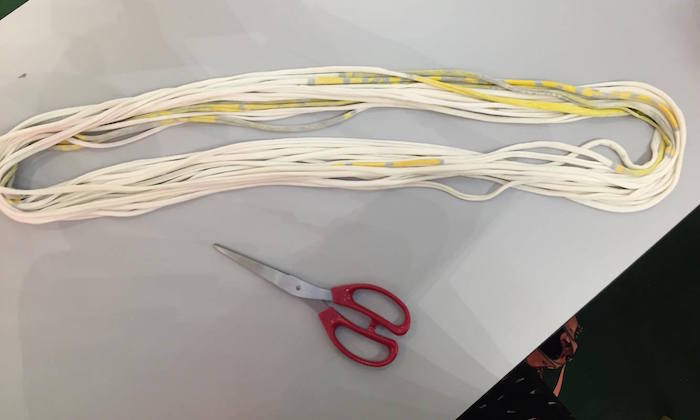

4. Stretch each strip
Now that you’ve cut all your strips, stretch each of them as wide as you can and you should immediately start seeing the ends curl into each other, forming thick, noodle-like strands. (I had to change my material as the previous shirt’s fabric and thread weft weren’t suitable!) If you’re making a scarf, don’t worry if your result doesn’t look like the image above – you would want the strips to be thicker in order to keep you warm, after all!
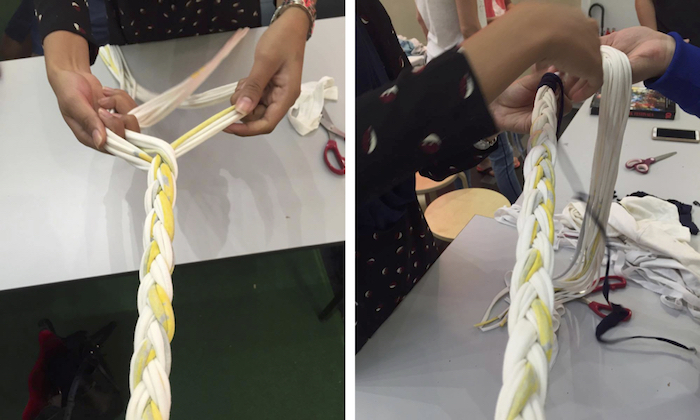

5. Cut anywhere in the loop to braid
Having braids in your necklace or scarf will give more character to your piece. This would be especially great if you have strips in different colours! To start, cut anywhere along the loop so you’ll get open ends to braid with. Braid the strands to about halfway, and take a contrasting colour strip to tie at the end of the braid.
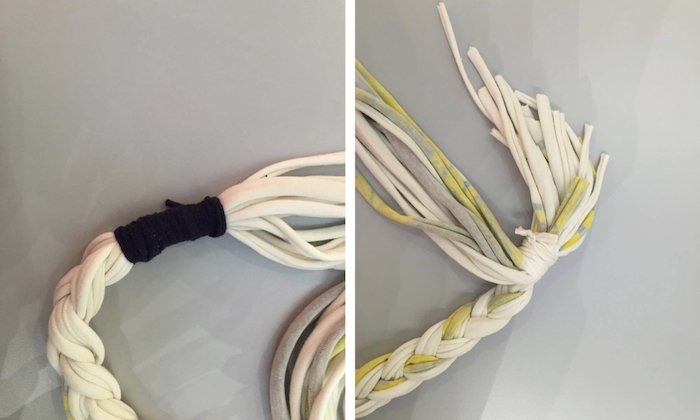

6. Take ends and tie together to loop necklace
You should be left with something that looks like the above left image. Leave the rest of the length as is and tie the ends together. I made a pretty bulky knot as you can see in the top right image, but you can tie it however suits you best.
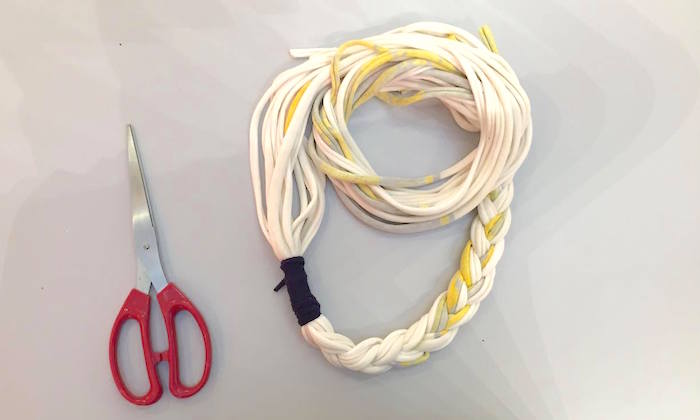

7. Complete by looping twice and style accordingly
If you have enough length in your necklace or scarf, you can loop it twice in a cool ‘infinity’ style and that’s it – you’re done!
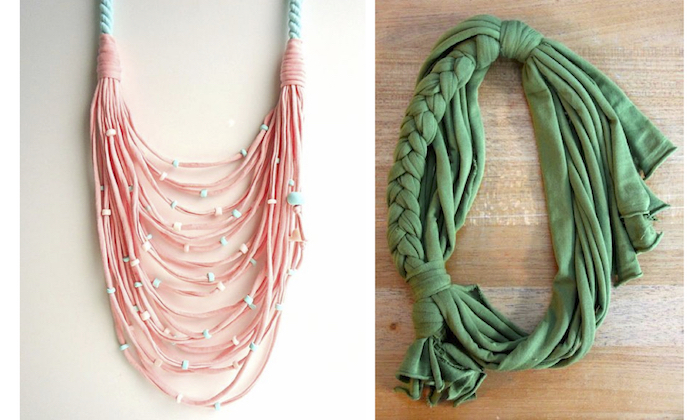

Check out these other variations online that you can try for yourself, mama! We love the two versions above with the colourful pastel beads and cascading strands, and also the thick braid. Post your creations and tag us on Instagram with the hashtag #ORPgreen!


 View All



 View All


 View All


