


 View All

 View All


 View All
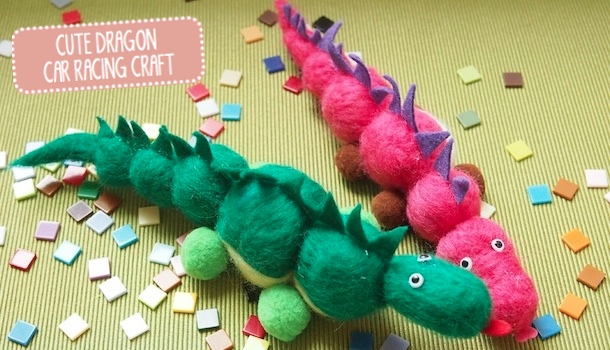

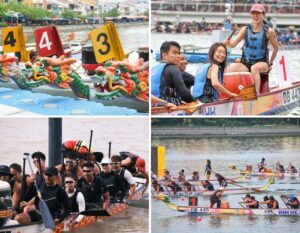
Living in Singapore, we get a lovely medley of public holidays. However unlike our fellow mamas in Hong Kong we don’t officially have the Tuen Ng Festival as one of our holidays. Tuen Ng Festival falls on the 5th day of the 5th month in the Chinese calendar, and this year the holiday snuck past us on June 12. A folk story behind this Festival has manifested the traditional activity of Dragon Boat Racing.
Dragon Boat Racing is popular amongst local families as well as the expatriate community. Inspired by this festival, we were motivated to make these cute Dragon Race Cars using the technique of needle felting.
A gentle reminder: needle felting involves using an extremely sharp needle, so the felting part should be left for the adults while the decorating of the dragon can be a fun activity to do with the little ones!
What You Need:
- Felting wool
- Felting needle
- Felting board
- Small pom-pom
- Felt sheets
- Ceramic glue or Super glue
- Scissors
What To Do:
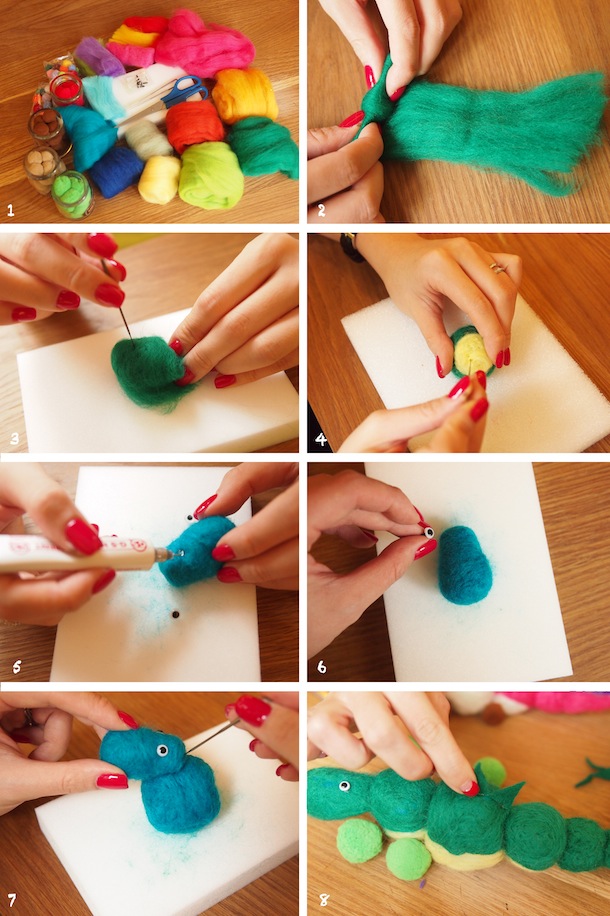
1. Have your materials ready.
2. To make your wool ball, roll the wool sheet very tightly with your hands to approximately twice the size of your desired final size.
3. Place your rolled wool onto the felting board and begin needling with the felting needle. The needle should go in and out of your wool vertically (otherwise you may bend or break your needle). Keep repeating until your wool has reached the desired size, shape and tightness (if this is your first time doing this, do note that this step may take a bit of time, just be patient!). Note: Keep your fingers away from the needle rod itself because if you lift up against the grain of the needle, you will hurt yourself!
4. To add patterns to your wool ball, take a small piece of wool and repeat the needling procedure to secure. Keep adding and needling until it reaches your desired effect.
5. To shape the head, follow the rule of thumb that the more needling, the smaller and tighter the section will become. Next, apply glue to the head where the eyes should go.
6. Fix the eyes on your dragon.
7. Repeat the above steps to produce wool balls of varying sizes for your dragon. Once ready, chain all of the dragon’s body parts together by using your felting needle to carefully fuse each ball together.
8. Once your dragon’s base is ready, your kids can get creative! We used felt sheets to cut out triangular shapes for the back of our dragon, and small, ready-made pom-poms as “wheels” for the car.
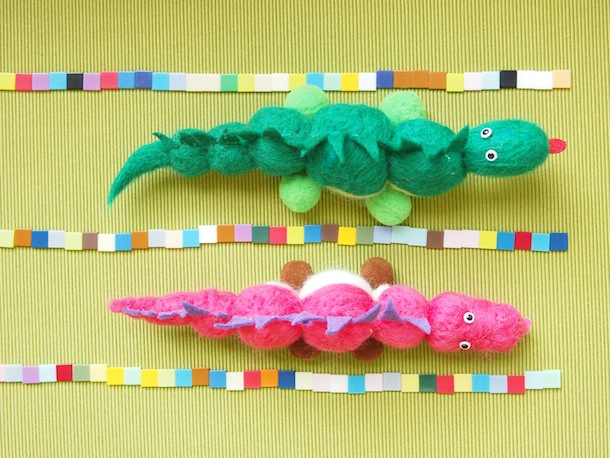
Have fun racing your Dragon Cars mama!
And for loads more cute, clever and crafty ideas, check out the SweetP website!