


 View All
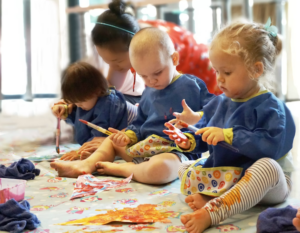


 View All


 View All

Hop to it mama – it’s time to get cracking with the Easter plans for your lil’ ones!
In the spirit of painting pretty things – did you know painting eggs for Easter goes back to early Christianity, while in other cultures it can symbolise the coming of spring? – The Party Elves have a few ideas to give you a new twist on decorating Easter eggs that you can try with your flock of chicks.
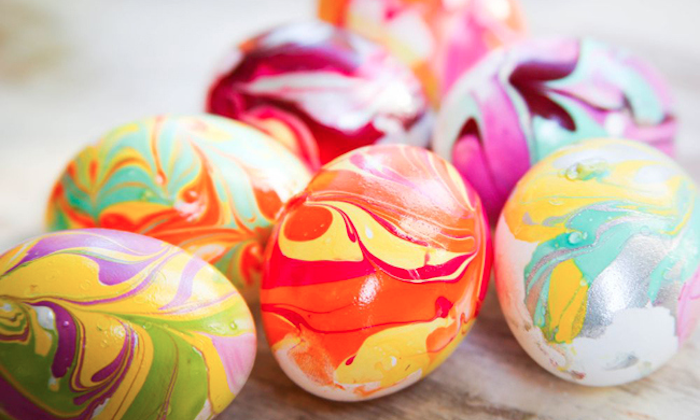
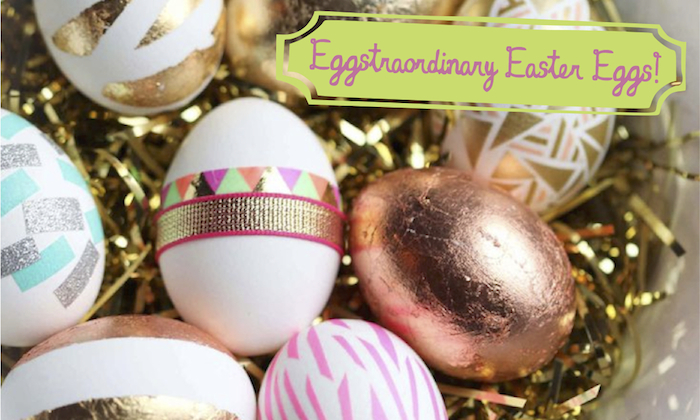
Metallic Marble Eggs
How cool is this?! All you’ll need is room temperature water and lots of different nail polish colours (metallics, silver and gold colours work really well).
- Pour the different nail polishes into a cup of room temperature water – the temperature is important! – and use lots of nail polish (it should float on the surface of the water).
- Next take a toothpick and swirl the colours together.
- Holding the egg between your fingers, dip it into the cup with swirly colours and hold underwater for a minute, then remove, and dry. This will only cover half the egg. You can leave them like that, or do the other side if you wish.
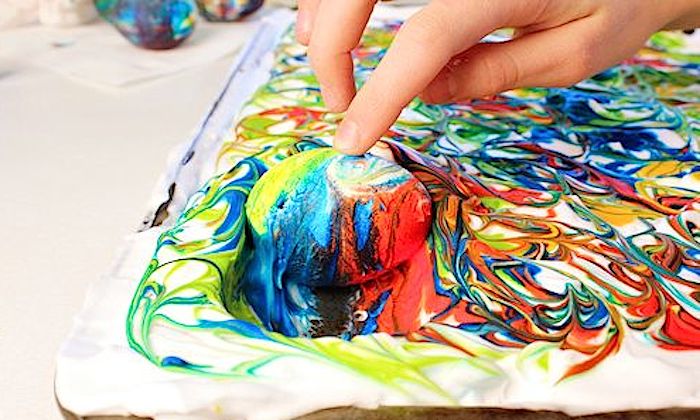
Foamed Eggs
Using shaving foam and some dyes gives you a lovely marble effect on the eggs, who knew?!
- On a thin layer of shaving cream, dot 2 – 3 colours randomly across the layer.
- Using a skewer, run the stick through the colours so they start to just merge, but don’t mix to make a new colour.
- Roll the egg from one end to the other and leave to dry.
- Once dry, gently wipe off the foam and voila! Eggciting new marbled delights.
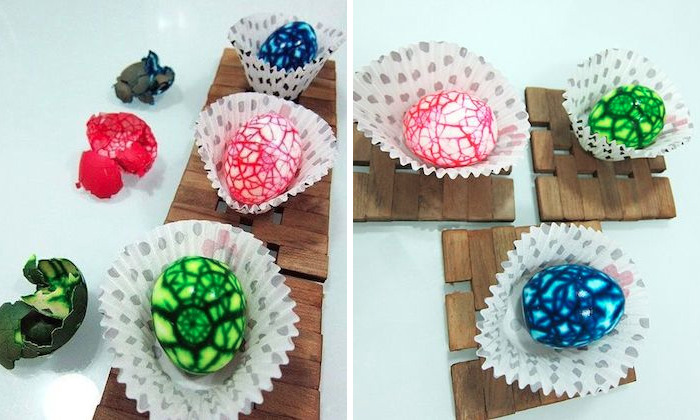
Marbled Eggs
And while we are on the topic of marbled delights – what about these peeled beauties?
- Boil the eggs and as you dry them, gently apply pressure and roll them around creating cracks in the shells.
- Dye them as normal and refrigerate the cracked eggs soaked in the dye mixture overnight.
- Finally, peel the shells and you get these gorgeous works of art!
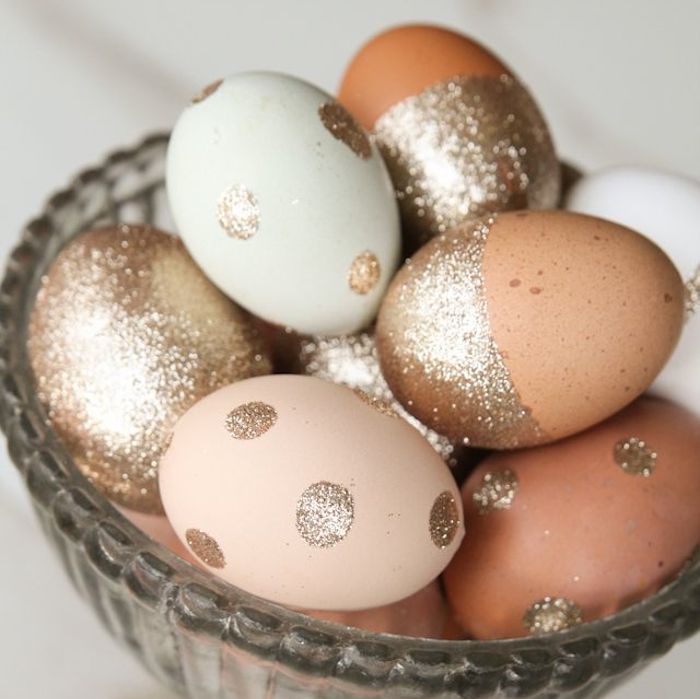
Glitter Eggs
Glitter eggs are simply gorgeous. We set the glitter, sequins and bling stickers out every year at our annual Easter event and the children really create some beautiful pieces of art.
- Apply white glue on the egg, and then sprinkle it, roll it, make patterns on it… the sky is the limit! No matter what you do, it will look simply spectacular.
- Tip: If you dye the eggs beforehand, you get a richer looking egg.
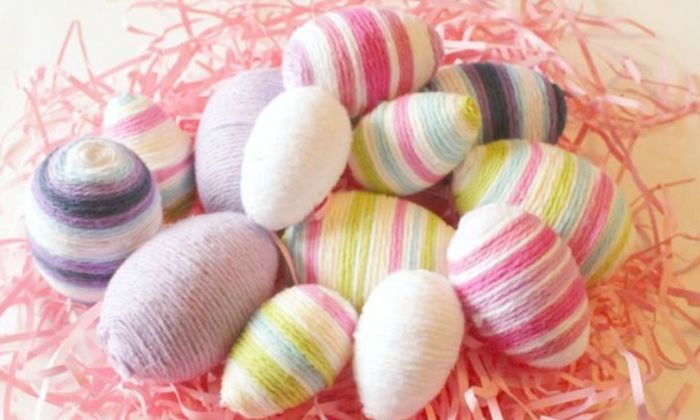
Wikki Stix Eggs
We found this amazing craft product thanks to thinkthank.com. Knitting yarn coated in sticky glue makes Wikki Stix reusable and the product sticks to any surface, without leaving a mess.
Perfect for decorating eggs, as our regular Easter bunnies often realise!
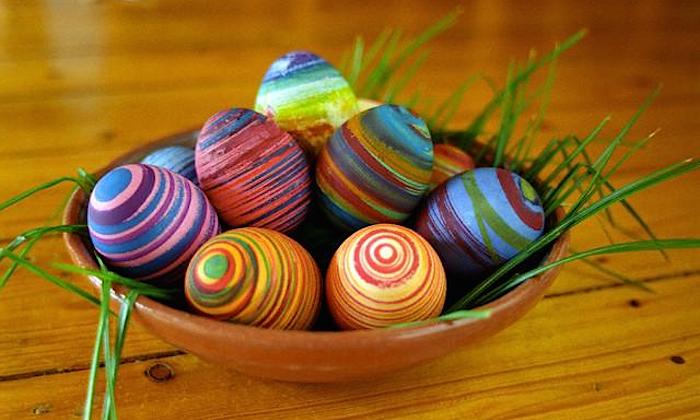
Banded Eggs
It’s a bit of a slippery exercise at first with the rubber bands, but the results are worth it. All you need is a few different coloured dyes, rubber bands and a bit of imagination!
- Start with your lightest colour (perhaps pink or yellow), dip the egg in and let it dry.
- Wrap several rubber bands around the egg, leaving plenty of empty space.
- Dip the egg into magenta dye. Remove the bands and dry.
- Next, wrap more bands around the egg, but not around the area you just dyed. You can determine the patterns that you want – you may wrap them all in the same direction around the width of the egg or have them criss-cross each other and make gingham eggs. Eggs-sperimenting is really half the fun with this method.
- Less is more is the name of the game with this method; 2 – 3 layers of colour is usually sufficient.
- And the result? These beautiful multi-coloured eggs.
Waxed Eggs
Use wax crayons on boiled eggs. Draw spirals, names, secret messages — get creative, mama! Be sure you press hard when writing on the egg to make sure the wax gets on the eggs. Then dye the eggs and watch your designs emerge. This works best on pale eggs.
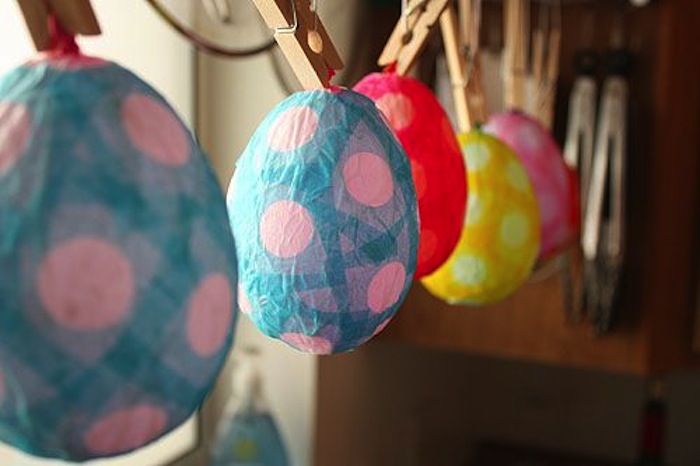
Tissue Paper Eggs
- Tear pieces of tissue or crepe paper into small pieces.
- Brush the eggs with water and immediately stick a piece of paper on in a collage-like effect.
- Cover the entire egg, smoothing out the paper as much as you can. It won’t look pretty, but it’s ok because the water dries up and the paper falls off, leaving behind these lovely shades of colour.

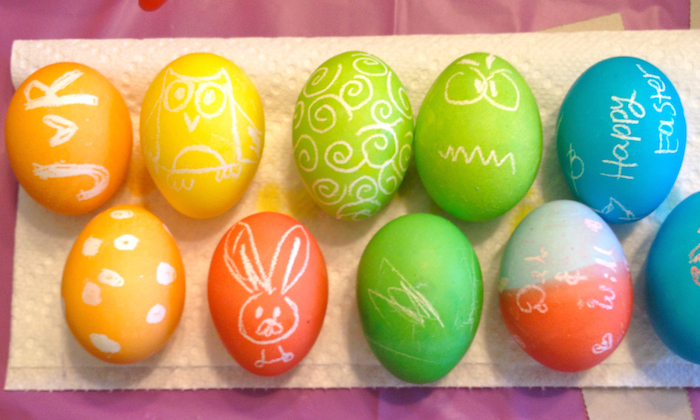
Chalkboard Eggs
Paint the eggs with blackboard paint (you can get the spray can version from Art Friend) and use chalk to decorate it.
Alternative Paint Brushes
Can’t be bothered with the organisation around all these other methods? Just get some regular paint, and give the children different textured everyday tools like bubble wrap, tooth brushes, scrub brushes, sponges, cotton or whatever you can find in your HDB household goods stores, then let them create their masterpiece!
Have fun with all these different ways of decorating eggs, and don’t be afraid to try anything: even broken crayons sprinkled on hot boiled eggs require zero preparation, but give you m-egg-nificient results.
Note: Remember that in Singapore, the majority of eggs are brown, so colours might look a little different than they would if you used white eggs. White eggs are available from most regular supermarkets and wet markets.
![[𝗛𝗶𝗱𝗱𝗲𝗻 𝗚𝗲𝗺] 𝗪𝗲 𝗙𝗼𝘂𝗻𝗱 𝗧𝗵𝗶𝘀 𝗙𝗥𝗘𝗘 𝗚𝗮𝗿𝗱𝗲𝗻 𝗪𝗶𝘁𝗵 𝗔 𝗪𝗮𝘁𝗲𝗿𝗳𝗮𝗹𝗹 𝗜𝗻 𝗔𝗻 𝗔𝗶𝗿𝗽𝗼𝗿𝘁 𝗡𝗲𝗮𝗿 𝗦𝗶𝗻𝗴𝗮𝗽𝗼𝗿𝗲 🌺
Heading to Kuala Lumpur during the holiday period? Check out this free hidden garden if you're transiting through KLIA 1. It's a small, open-air enclave that's fab for stretching your legs, plus it's got lots of cool little local details for the kiddos to spot, including replicas of Rafflesia flowers, pitcher plants and hornbills!
Link in bio or comment "KL" for our comprehensive guide to visiting Kuala Lumpur with kids!](https://www.sassymamasg.com/wp-content/plugins/instagram-feed/img/placeholder.png)
