


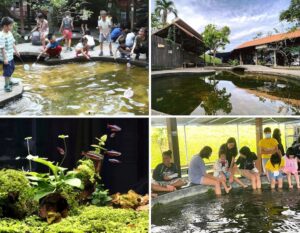
 View All


 View All


 View All
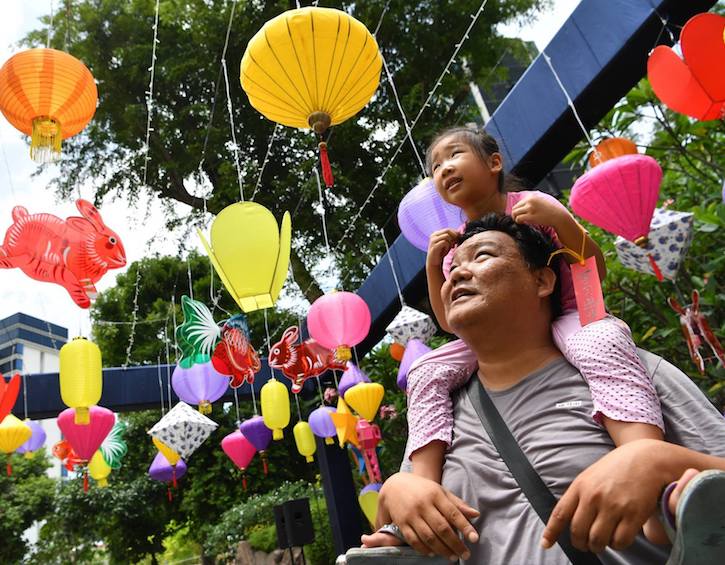
Celebrate the Mid-Autumn Festival with your kids by getting crafty with these easy arts & crafts ideas Make playdough mooncakes, mooncake art prints and paper lanterns
Now that you’ve chosen your mooncakes and are all up to speed on the meaning of the Mid-Autumn Festival, it’s time to get your kids into the spirit of this traditional festival, too! Get the arts and crafts out (art supplies here) and settle in for an afternoon of fun Mid-Autumn Festival arts & crafts.
3 Easy Mid-Autumn Festival Crafts for Kids:
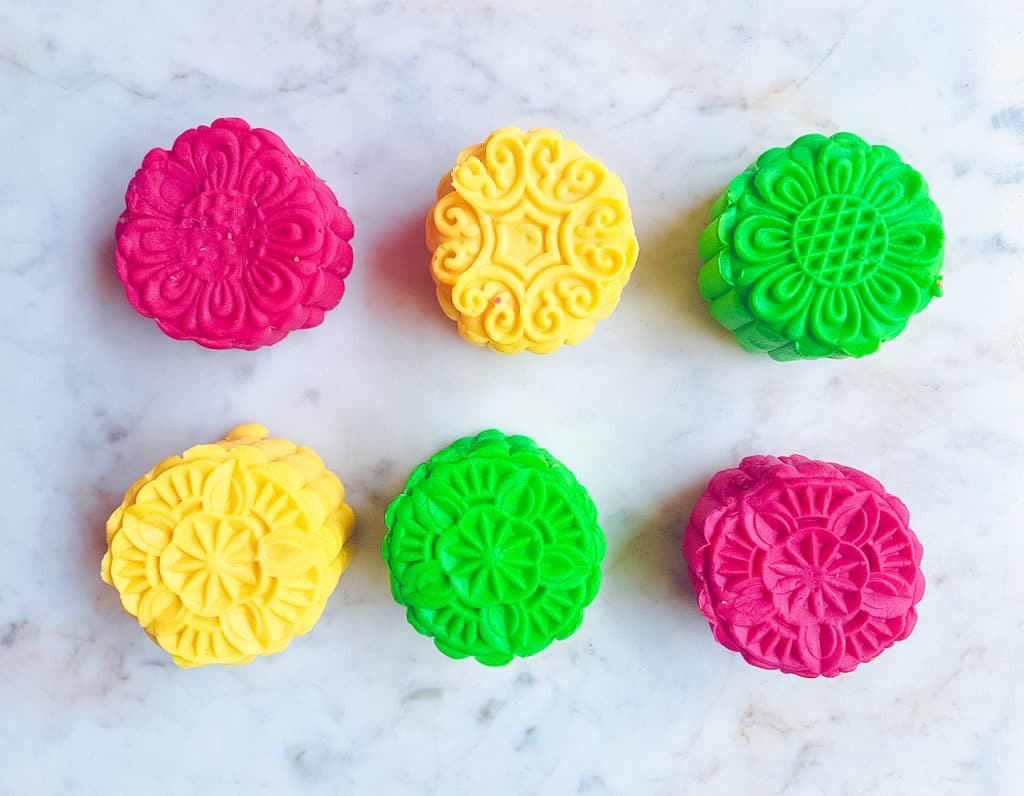
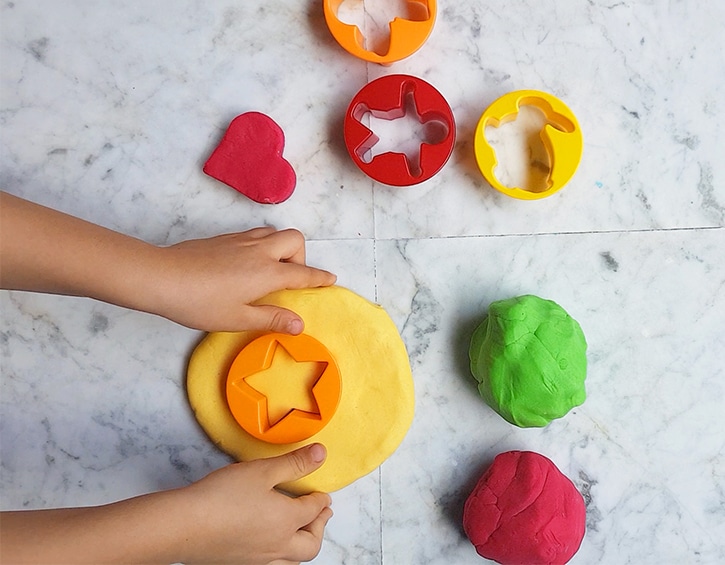
1. Make Playdough Mooncakes
What You’ll Need:
– Coloured playdough (store bought or make at home with our super quick no-cook recipe here.
– Mooncake mould (available at traditional stores in wood or in plastic at baking stores like Phoon Huat for around $10)

What to do:
Let your kids use your mooncake mould to make their own playdough mooncakes.
It’s fun if you have different coloured playdough to use — and if it’s homemade you won’t worry too much if the kids make different coloured “lotus paste” centres and it all ends up like one brown splodge in the end (as now you know how simple and cheap it is to make more!).
Read more: Super quick no-cook playdough recipe.
2. Mooncake Art Prints
What You’ll Need:
– Mooncake mould (available at traditional stores in wood or in plastic at baking stores like Phoon Huat)
– Paints and paintbrushes
– Paper

What to do:
1. Use your paintbrush to paint the mooncake moulds different colours. Use a different paint for each stamp so you get a fun array of patterns and colours.
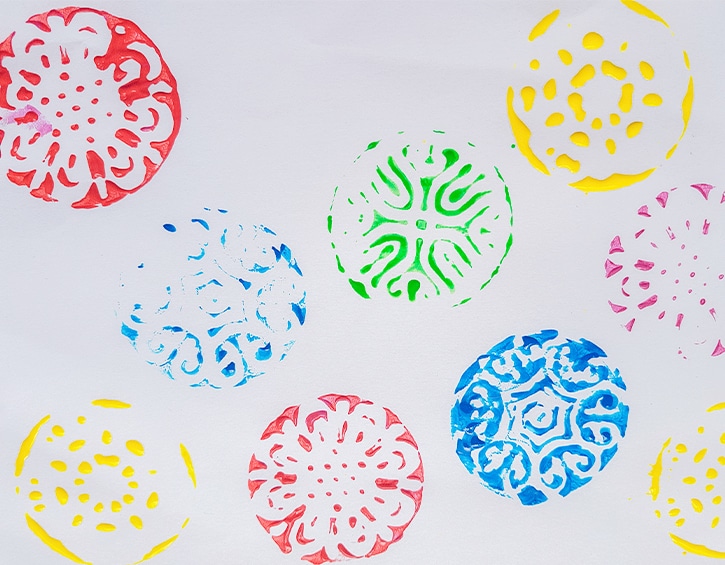
2. Stamp the moulds onto your paper – get the kids to push down hard to leave a mark!
3. Craft Paper Lanterns
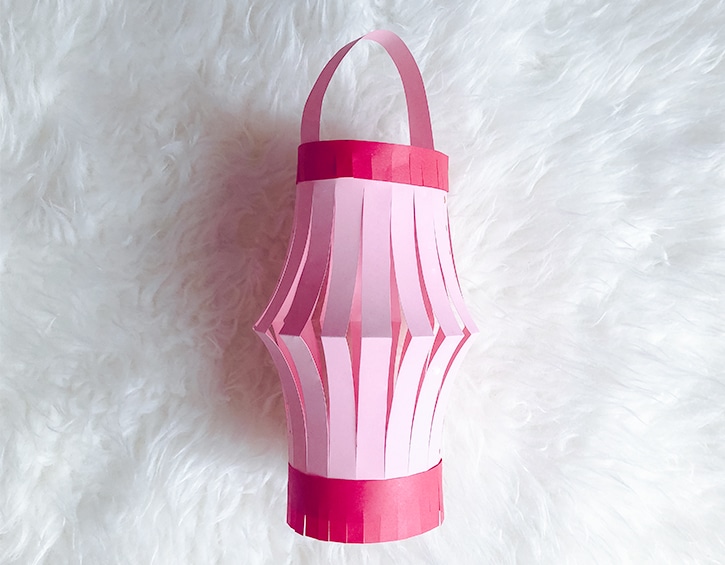
What You’ll Need:
– A4 sized coloured papers
– Scissors
– Glue or Tape
– Ruler
– Materials for decorating (e.g. sequins, glitter glue etc;)

What to do:
Step 1: On the shorter end of your paper, measure and cut off a 2cm strip. Put the strip aside as we will need it again at a later step.
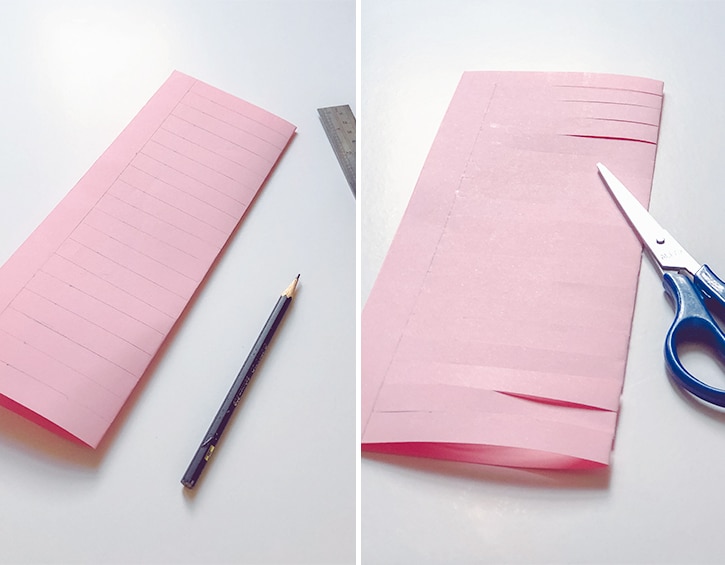
Step 2: Fold the paper into half. Once that’s done, mark out a 2cm margin from the top of the fold before drawing in lines (1.5cm apart) straight down.
Step 3: Cut through the various lines that you have marked out, be careful not to cut past the 2cm margin.
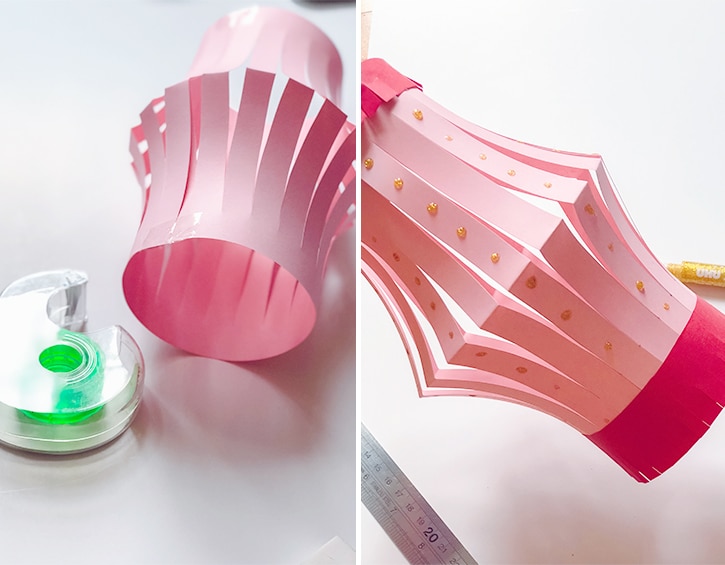
Step 4: Unfold your paper and tape or glue the two ends together to form the shape of your lantern.
Step 5: Decorate! You can take a different coloured paper to add fringe trimmings to your lantern. All you have to do is to cut 2cm and 4cm strips from a coloured paper of your choice and cut little snips down one side of the strip. Paste the 2cm strip on the top of your lantern and the 4cm at the bottom. You can also use glitter glues and sequins to add a little sparkle to your lantern.
Step 6. To form the handle of your lantern, take the 2cm strip that you have cut off in step 1 and attached both ends of it onto the inner side of the lantern.
Happy crafting, kiddos!

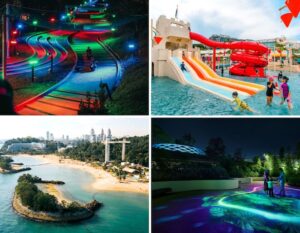
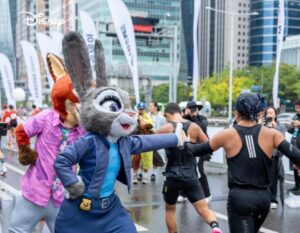
![[𝗙𝗜𝗥𝗦𝗧 𝗟𝗢𝗢𝗞] 𝗟𝗮𝗿𝗴𝗲𝗿-𝗧𝗵𝗮𝗻-𝗟𝗶𝗳𝗲 𝗗𝗶𝘀𝗻𝗲𝘆 𝗜𝗻𝘀𝘁𝗮𝗹𝗹𝗮𝘁𝗶𝗼𝗻𝘀 & 𝗦𝘁𝘂𝗻𝗻𝗶𝗻𝗴 𝗟𝗶𝗴𝗵𝘁𝘀 𝗔𝘁 𝗦𝗲𝗻𝘁𝗼𝘀𝗮’𝘀 𝗠𝗮𝗴𝗶𝗰𝗮𝗹 𝗜𝘀𝗹𝗮𝗻𝗱 𝗔𝗱𝘃𝗲𝗻𝘁𝘂𝗿𝗲
Disney fans, this one’s for you! Plan a fun family day out at Sentosa from 24 June to 20 September 2026 to soak in all of the Disney magic. Look forward to larger-than-life Disney, Pixar and Marvel-inspired installations during the day and illuminated manta rays, star-lit paths and ocean-inspired lights by night. Be sure to check out all seven themed areas inspired by the Disney Cruise Line and hop aboard the Singapore Cable Car for more immersive Disney-inspired experiences.
𝗪𝗵𝗮𝘁 𝘄𝗲 𝗹𝗼𝘃𝗲:
- Plenty of free photo opportunities around the island
- Giant Baymax, Toy Story and Marvel-themed installations that the kids will love!
- Beautiful princess-inspired displays at Sensoryscape
- The glowing ocean-themed experience at the Southernmost Point after sunset
- Fun day-to-night transformation that feels like two different events
𝗪𝗵𝗮𝘁 𝘁𝗼 𝘁𝗮𝗸𝗲 𝗻𝗼𝘁𝗲 𝗼𝗳:
- Wear comfortable shoes as you’ll be exploring multiple locations.
- Some installations are spread out across the island, so plan a few hours for your visit.
- The nighttime displays are best enjoyed after sunset.
- Bring water, sunscreen and hats if you are visiting during the day.
Comment “disney” or tap the link in bio for all the deets!](https://www.sassymamasg.com/wp-content/plugins/instagram-feed/img/placeholder.png)
