


 View All


 View All


 View All
 Post Category - Green LivingGreen Living
If you haven’t noticed, the detox trend and fresh pressed juices craze has been on the rise in Singapore. I have to admit, I’ve definitely jumped on the bandwagon. I’ve been ordering juices from newbie detox juicing company, hic’Juice and in addition to feeling lighter and cleaner, I’ve also amassed a large collection of empty plastic bottles!
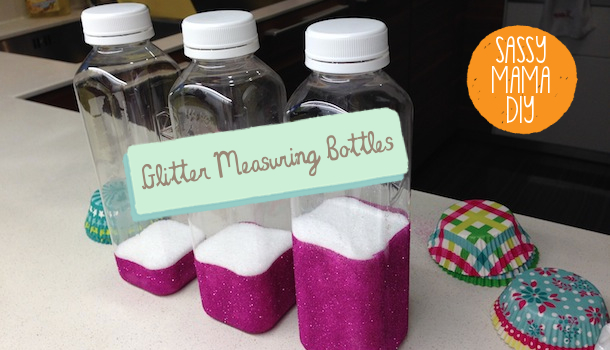
I’m huge on the 3 R’s (reduce, reuse and recycle) but more than that, I’m all for reusing an item before depositing it into the recycling bin. I couldn’t bring myself to recycle perfectly reusable bottles, so I decided to make the cutest measuring bottles for baking and cooking.
Materials:
- Empty plastic bottles
- Mod Podge matte and glossy (sealer and glue in one)
- Masking tape
- Paint brush
- Glitter of your choice
- Measuring cups
- Newspaper
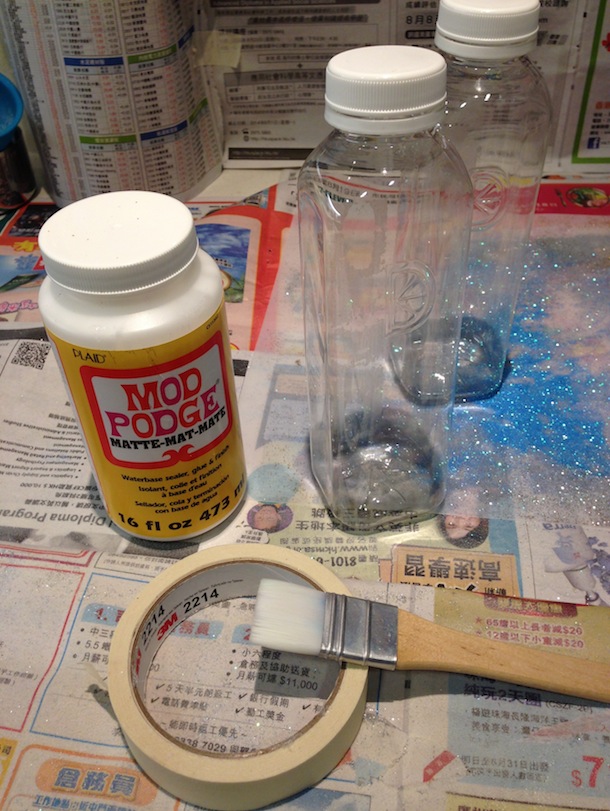
Step 1: Before you begin, make sure you lay out a lot of newspaper on your work area. There will be lots of glitter! Lay an extra piece of newspaper directly under where you’ll be pouring the glitter.
Step 2: Take your detox bottles and give them an overnight soak in hot soapy water to remove all the sticker labels. If a sticky residue is left, try using white vinegar soaked in a cotton pad or nail polish remover to get rid of the residue.
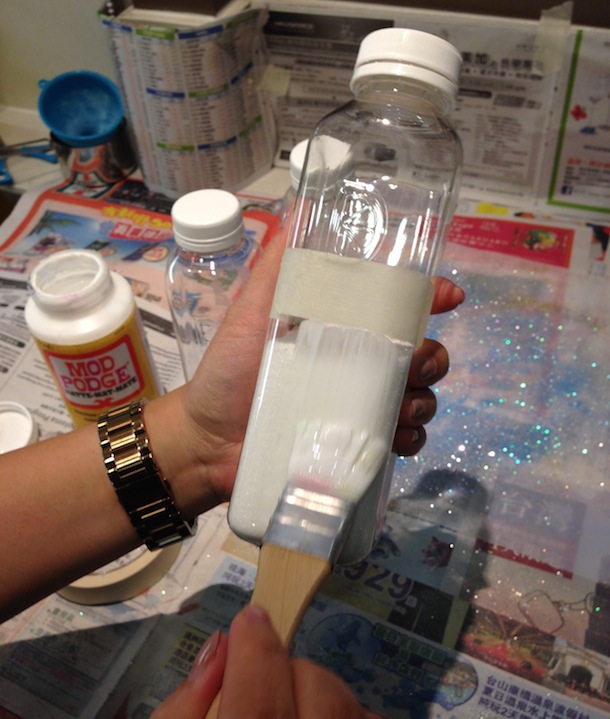
Step 3: Measure one cup of sugar or flour and pour into your first bottle. Take your masking tape and carefully wrap it around the top of where the sugar sits. Pull the masking tape taut and make sure the line is straight.
Step 4: Dip your paint brush into the matte mod podge (psst… don’t have mod podge? Make your own here!) and paint an even layer making sure there are no empty spots all around the bottom of the bottle. You can go over it a second time to make sure there are no areas left uncovered.
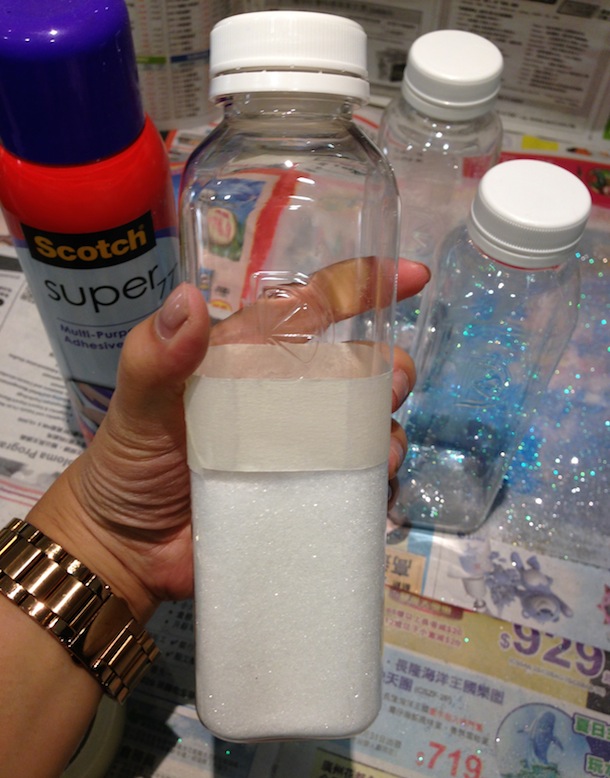
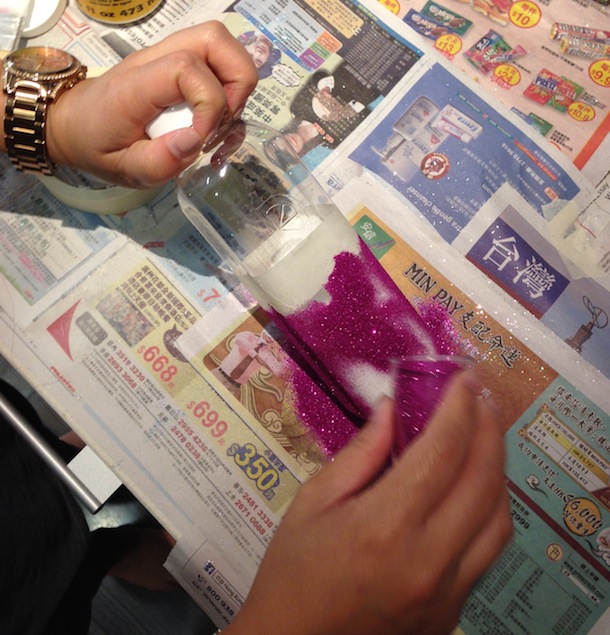
Step 5: Once you’re happy with it, generously pour glitter all over the bottle one side at a time. Don’t worry about using all the glitter in the container. You’ll be surprised to see how much or rather, how little you actually need! Make sure the entire section is covered in glitter, then tap away any excess. Set bottle aside and pour all the remaining glitter back into the container.
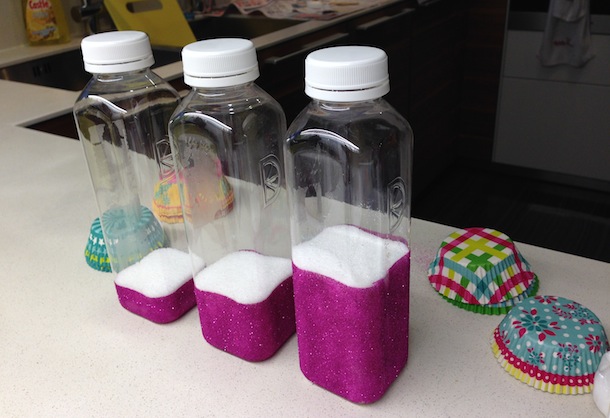
Step 6: Repeat these steps for the rest of your measurements. (I did 1/2 and 1/4 cups.)
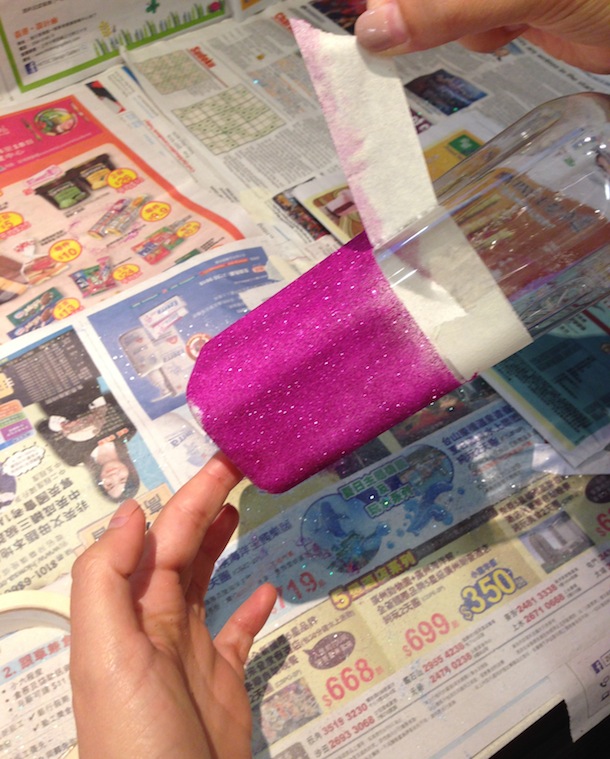
Step 7: Apply a coat of glossy mod podge to seal in your glitter and design.
Step 8: Remove the masking tape to reveal a straight edge and viola! Your very own measuring bottles.
These measuring bottles are not only useful but beautiful to display in your kitchen as well. Don’t need new measuring items? They are also perfect for vases or for storing other items that may need to be airtight — or even those little knick knacks (or sweets) your kids keep bringing home! Plus they’re a great way to measure out ingredients for your next baking project with the kids or to teach them about measurement!
I hope you enjoyed making these beautiful glittery measuring bottles! Remember that next time you’re tempted to recycle an item, think of how you can actually reuse it first into something useful and practical for your home.
Happy crafting, mamas!


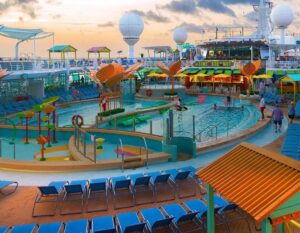
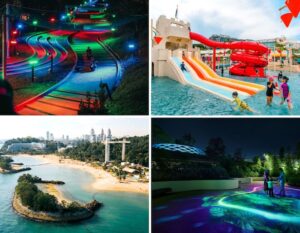
![[𝗙𝗜𝗥𝗦𝗧 𝗟𝗢𝗢𝗞] 𝗟𝗮𝗿𝗴𝗲𝗿-𝗧𝗵𝗮𝗻-𝗟𝗶𝗳𝗲 𝗗𝗶𝘀𝗻𝗲𝘆 𝗜𝗻𝘀𝘁𝗮𝗹𝗹𝗮𝘁𝗶𝗼𝗻𝘀 & 𝗦𝘁𝘂𝗻𝗻𝗶𝗻𝗴 𝗟𝗶𝗴𝗵𝘁𝘀 𝗔𝘁 𝗦𝗲𝗻𝘁𝗼𝘀𝗮’𝘀 𝗠𝗮𝗴𝗶𝗰𝗮𝗹 𝗜𝘀𝗹𝗮𝗻𝗱 𝗔𝗱𝘃𝗲𝗻𝘁𝘂𝗿𝗲
Disney fans, this one’s for you! Plan a fun family day out at Sentosa from 24 June to 20 September 2026 to soak in all of the Disney magic. Look forward to larger-than-life Disney, Pixar and Marvel-inspired installations during the day and illuminated manta rays, star-lit paths and ocean-inspired lights by night. Be sure to check out all seven themed areas inspired by the Disney Cruise Line and hop aboard the Singapore Cable Car for more immersive Disney-inspired experiences.
𝗪𝗵𝗮𝘁 𝘄𝗲 𝗹𝗼𝘃𝗲:
- Plenty of free photo opportunities around the island
- Giant Baymax, Toy Story and Marvel-themed installations that the kids will love!
- Beautiful princess-inspired displays at Sensoryscape
- The glowing ocean-themed experience at the Southernmost Point after sunset
- Fun day-to-night transformation that feels like two different events
𝗪𝗵𝗮𝘁 𝘁𝗼 𝘁𝗮𝗸𝗲 𝗻𝗼𝘁𝗲 𝗼𝗳:
- Wear comfortable shoes as you’ll be exploring multiple locations.
- Some installations are spread out across the island, so plan a few hours for your visit.
- The nighttime displays are best enjoyed after sunset.
- Bring water, sunscreen and hats if you are visiting during the day.
Comment “disney” or tap the link in bio for all the deets!](https://www.sassymamasg.com/wp-content/plugins/instagram-feed/img/placeholder.png)
